Hyde4thHeaven.GitHub.io
How to create a new GitLab pages from scratch (HTML pages)
23 November 2020
On GitLab:
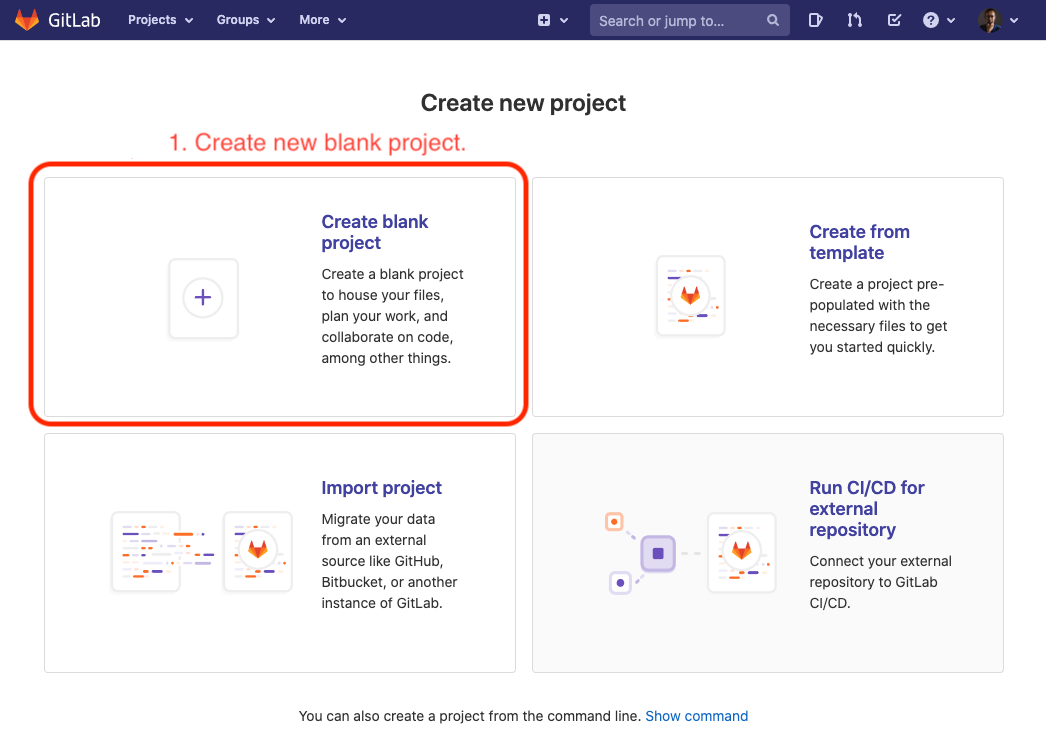
1. Create a new blank project.
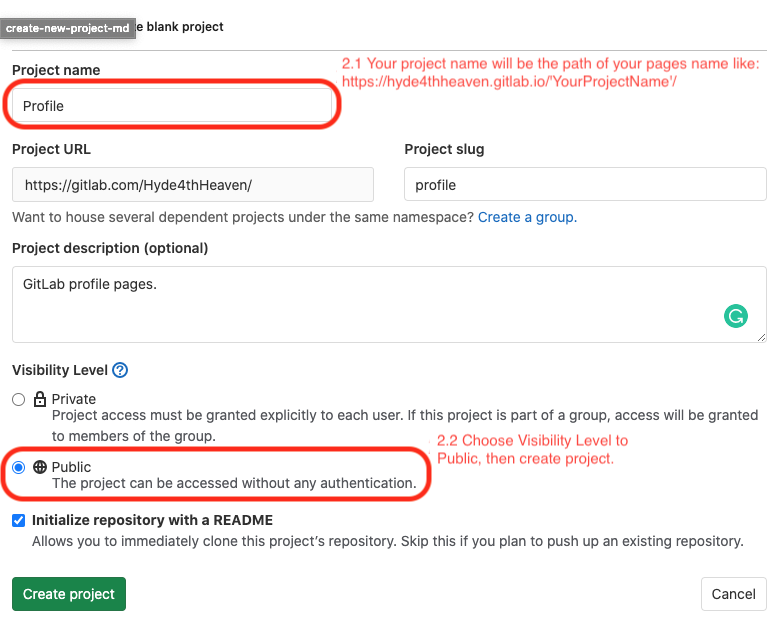
2. Detailed project.
2.1 Your project name will be the path of your pages name like: https://’YourGitLabName’.gitlab.io/’YourProjectName’/
2.2 Choose Visibility Level to Public, then click ‘Create project’ button.
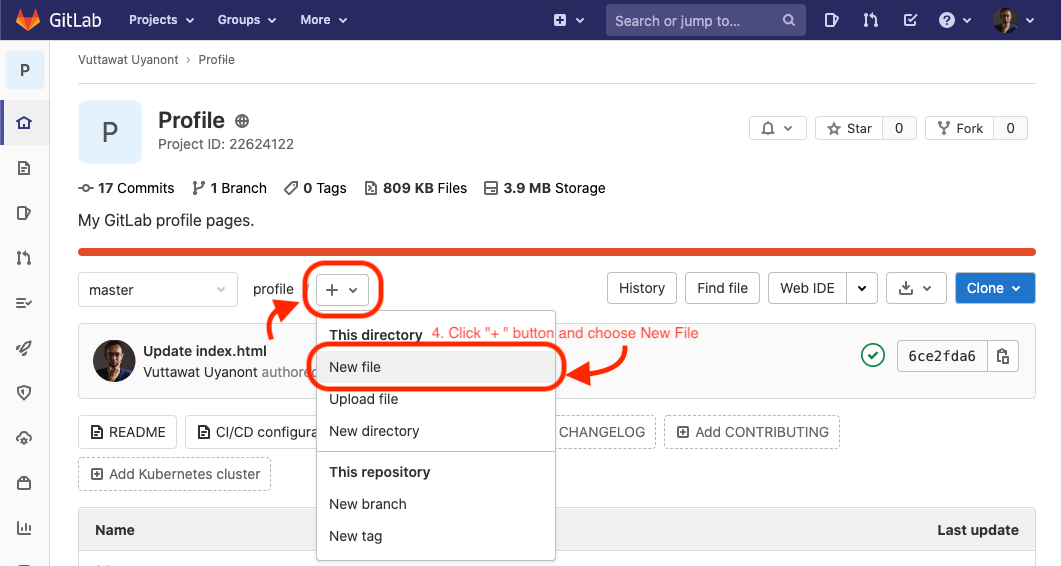
3. Go to your project ‘YourProjectName’.
4. Click “+ New File” button to create a html file.
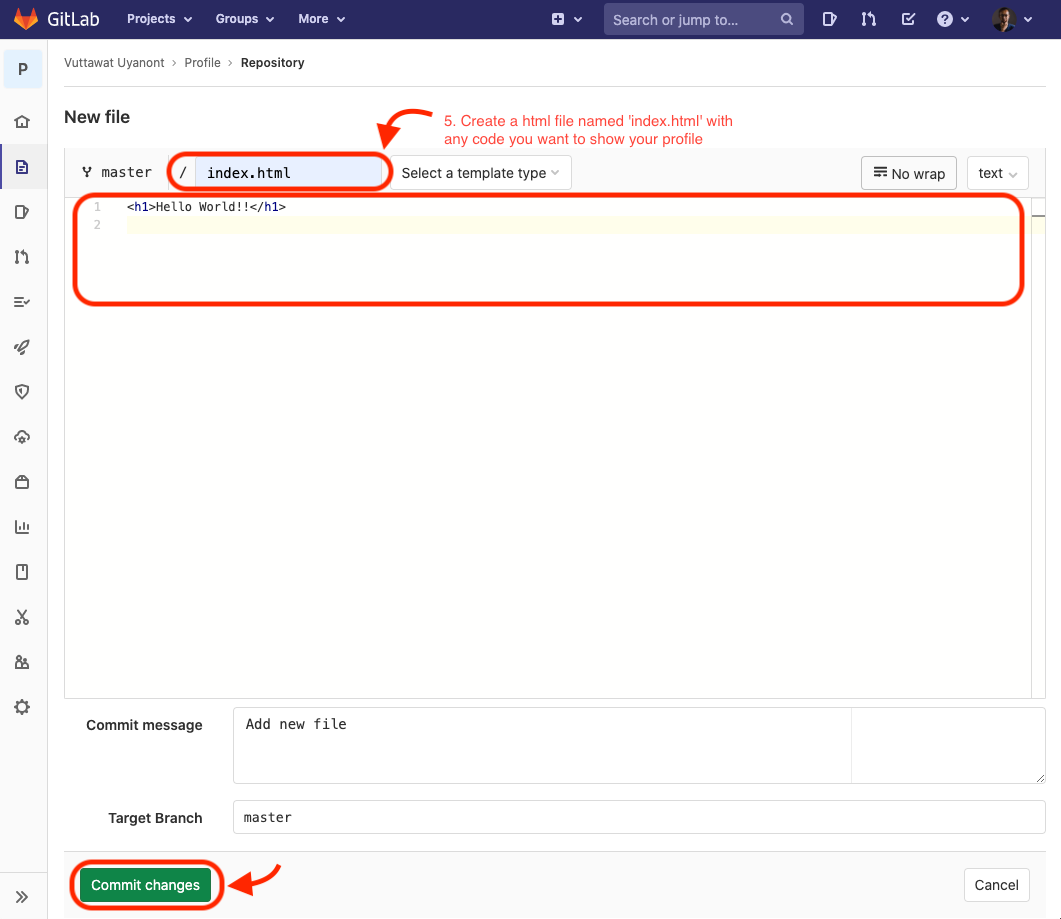
5. Create a html file named ‘index.html’ with any code you want to show your profile, then Commit changes.
6. Click “+ Set up CI/CD” button.

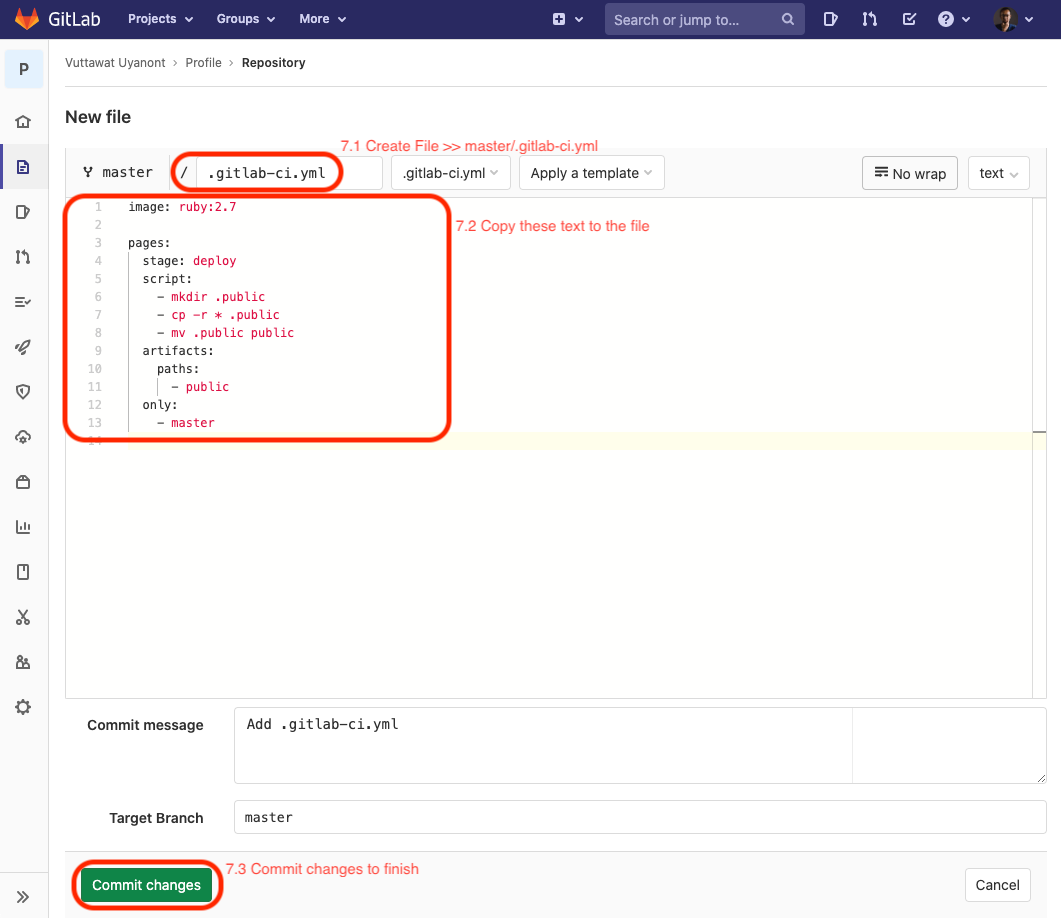
7. Create the master/.gitlab-ci.yml file to run your pages.
7.1 Create New File » master/.gitlab-ci.yml
7.2 Copy these text to the file:image: ruby:2.7
pages:
stage: deploy
script:
- mkdir .public
- cp -r * .public
- mv .public public
artifacts:
paths:
- public
only:
- master
7.3 Commit changes to finish.
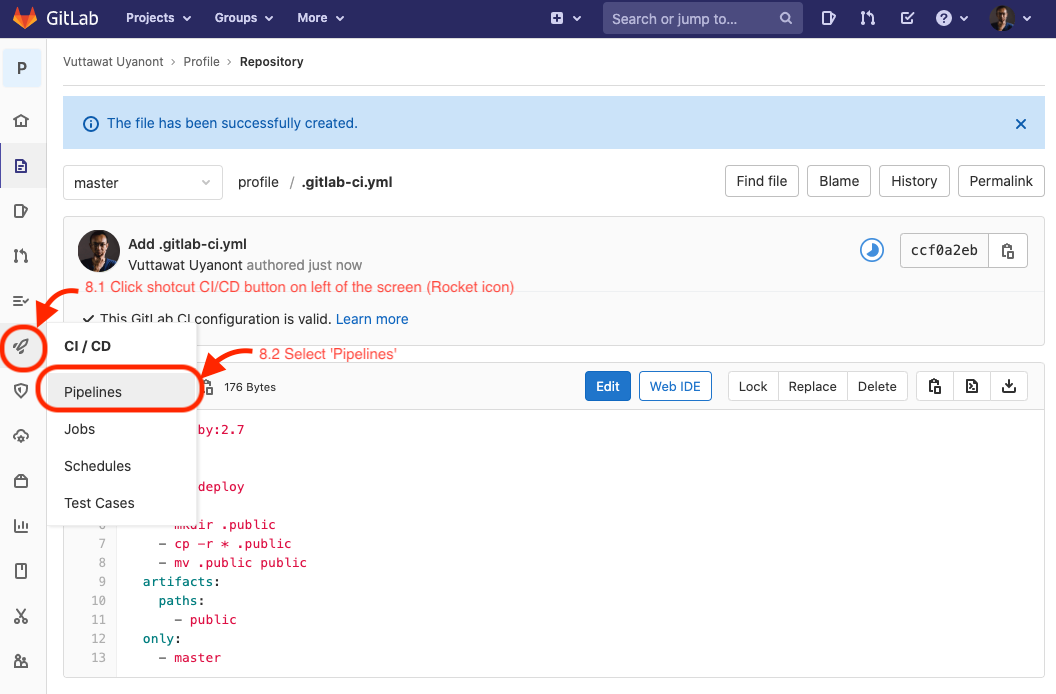
8. Check Pipelines.
8.1 Click shortcut CI/CD button on the left of the screen (Rocket icon).
8.2 Select ‘Pipelines’
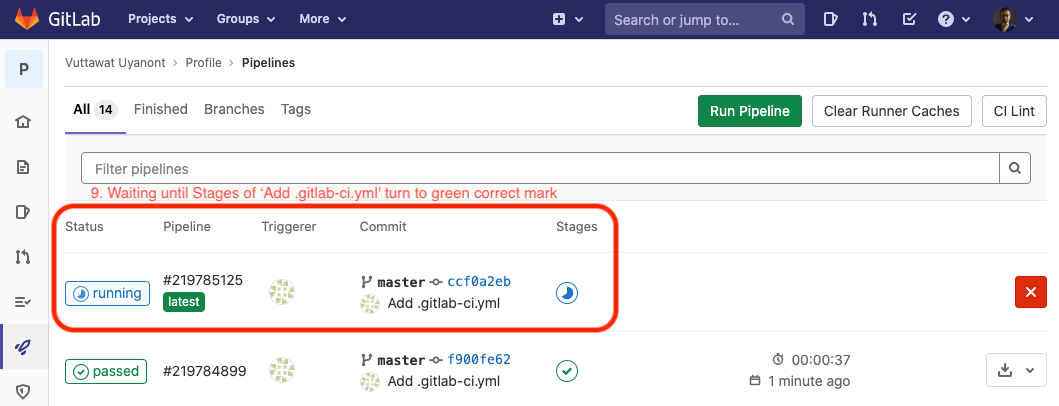
9. Waiting until Stages of ‘Update .gitlab-ci.yml’ turn to green correct mark.
10. Finished! Enjoy your profile pages at https://’YourGitLabName’.gitlab.io/’YourProjectName’/.
This is my GitLab pages, https://hyde4thheaven.gitlab.io/profile/, created by this method. Take a tour!
Although my profile picture is quiet, but the real me can make some noise.Author: Vuttawat Uyanont Sexiest former engineer and banker who interested in IT & Tech, Sake, and Beer. Studying: Master Computer Science in Cybersecurity Management at Mahanakorn University. |
 |